How to set up Google account to use text-to-speech (TTS) voices
Google offers a whole range of different text-to-speech voices in different languages as cloud service.
The PixVis Video Dubber converts text to speech just before playing the caption. It invokes Google cloud service to get the audio stream.
Currently, Google offers this service for 1 million characters of Wavenet voices and for 4 million characters of Standard voices each month for free.
Higher volumes may incur fees. See the price list for more information:
https://cloud.google.com/text-to-speech/pricing.
Step 1: Create a Google Cloud Account
- Open Google Cloud console in a browser.
- When prompted to sign in, create a new account by clicking Create account.
- Follow the instructions to register your email address as a Google account. Alternatively, you can use a Gmail account or other Google account.
- Continue to the Google Cloud console and accept the Google Cloud Platform terms presented.
Step 2: Create a Google Cloud Project
Once your Google Cloud account is active, go the Google Cloud Console and:
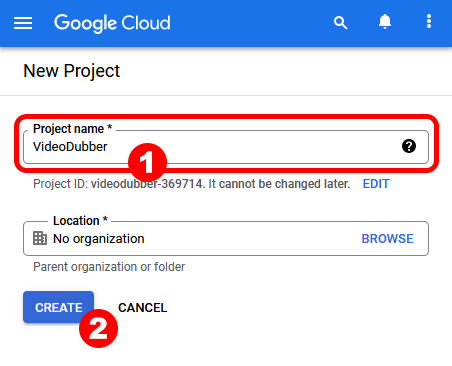
1. Create a new project with an appropriate name, e.g. "VideoDubber", and then click on CREATE.
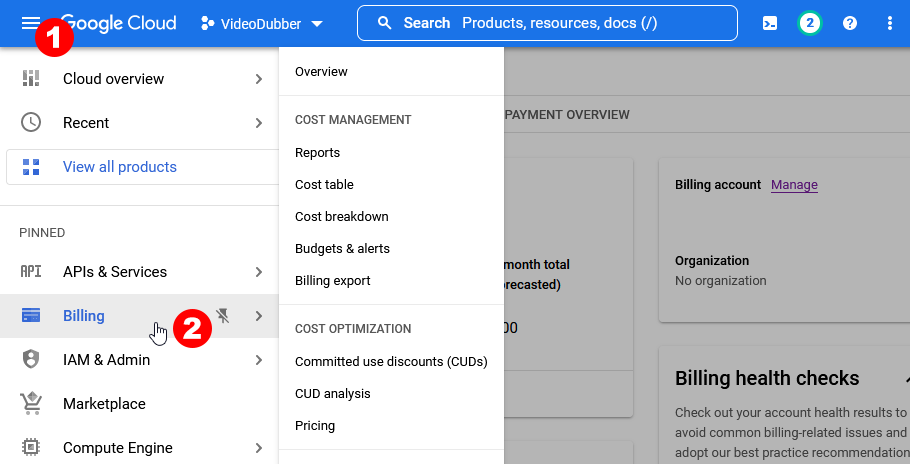
2. Go to Menu > Billing and link a credit card or similar to the project.
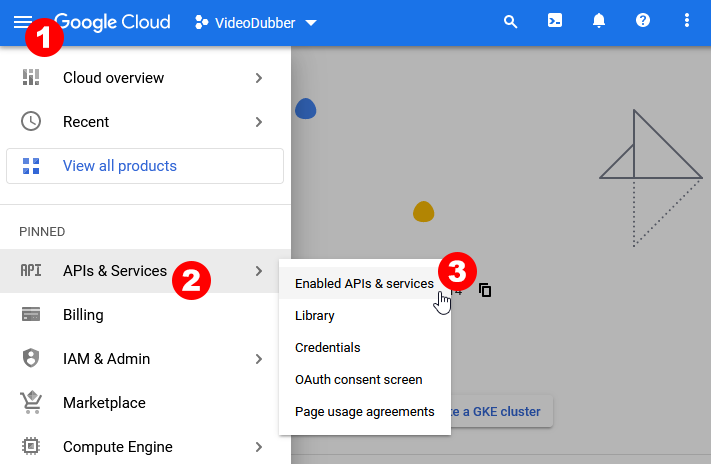
3. Go to Menu > APIs & Services > Enabled APIs & services.
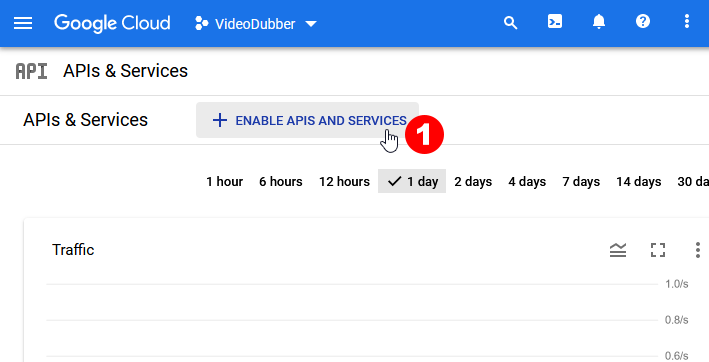
4. Click + ENABLE APIS AND SERVICES button.
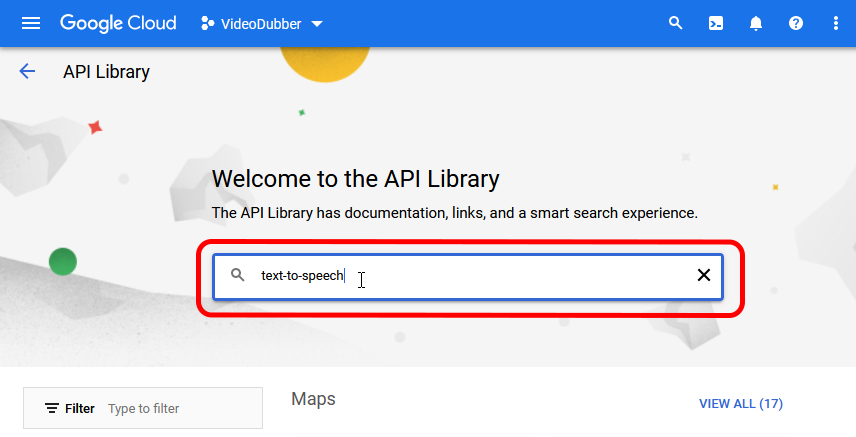
5. In API Library search for "text-to-speech".
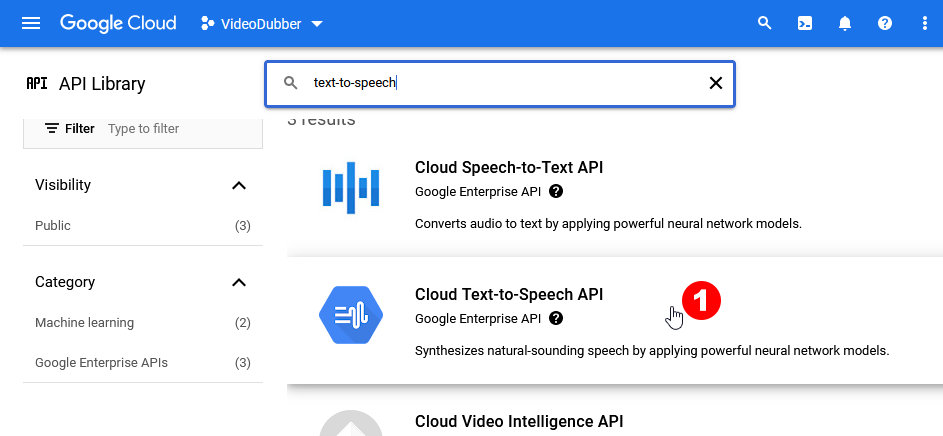
6. Click on Cloud Text-to-Speech API service in API list.
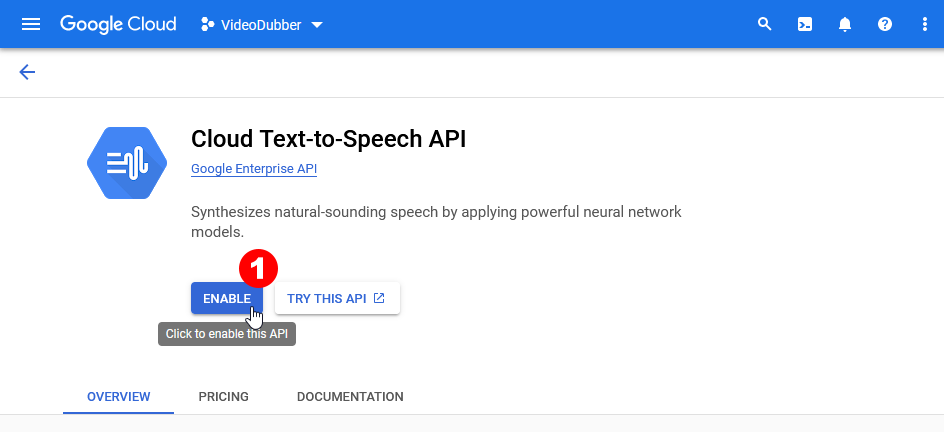
7. Click on ENABLE button to enable Text-to-Speech service.
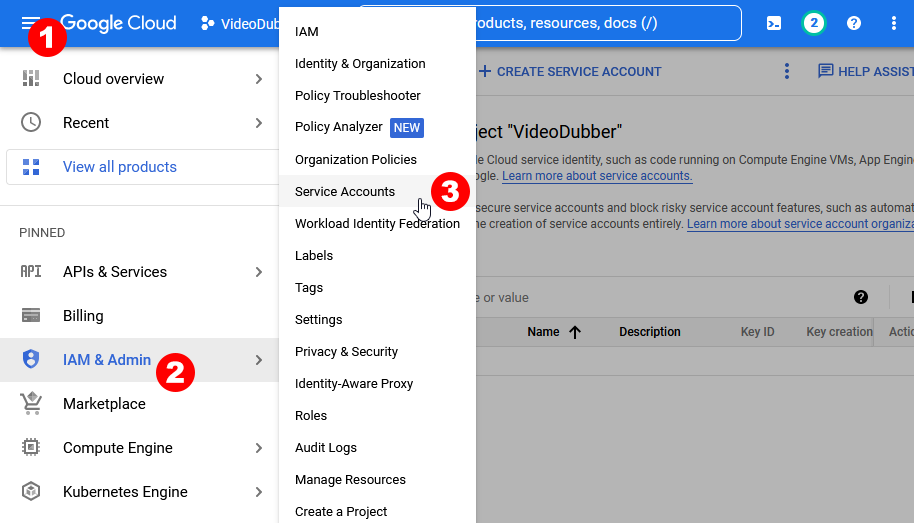
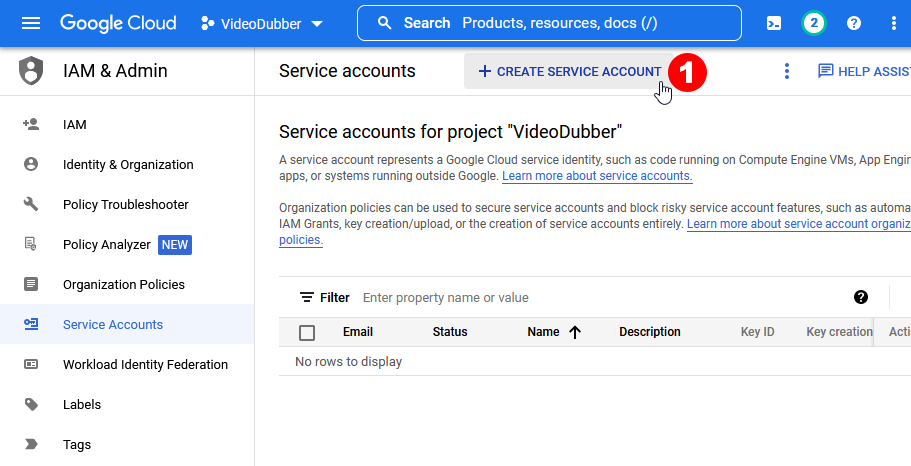
8. To create a service account, so the PixVis Video Dubber app can authenticate with Google Cloud and use this project, go to the Menu > IAM & Admin > Service Accounts.
9. Click on + CREATE SERVICE ACCOUNT.
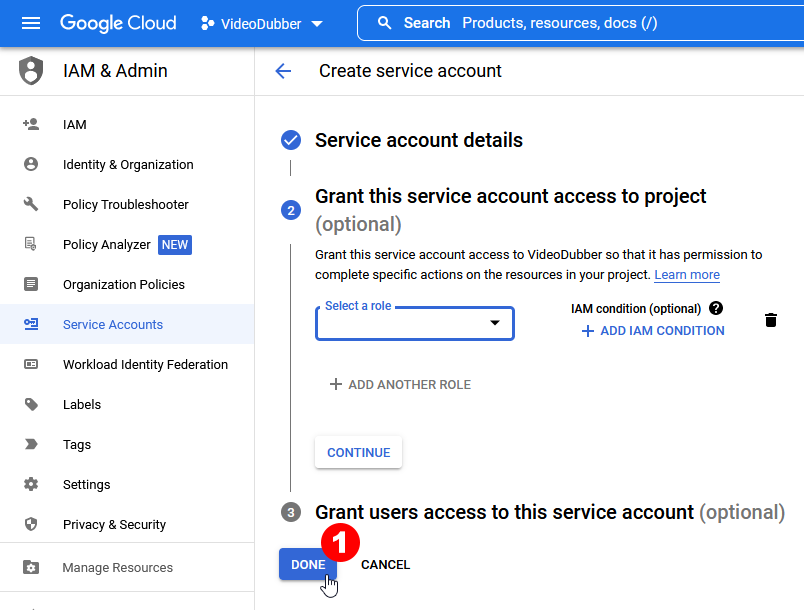
10. Fill in the service account details with appropriate values and click on CREATE AND CONTINUE.
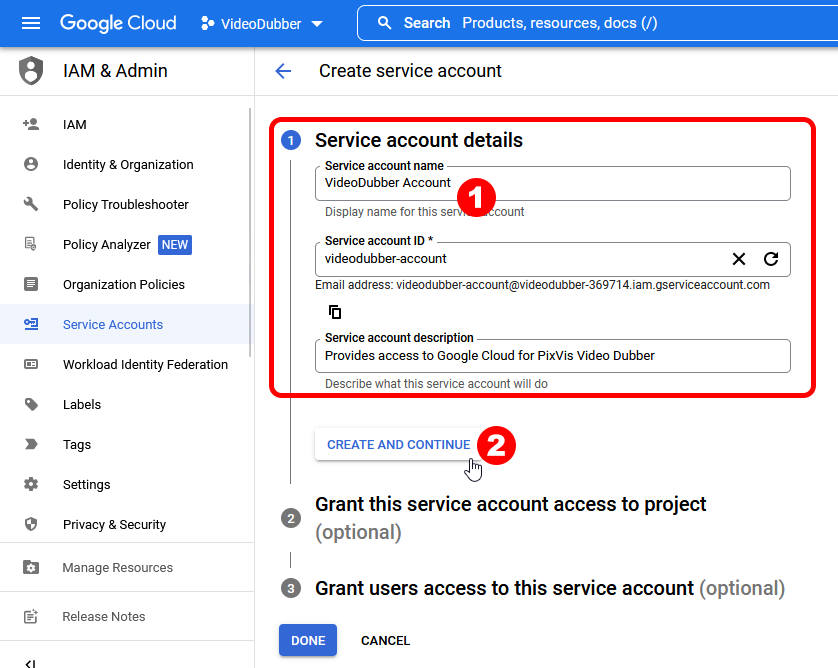
11. Wait for the account to be created and then click on DONE button.
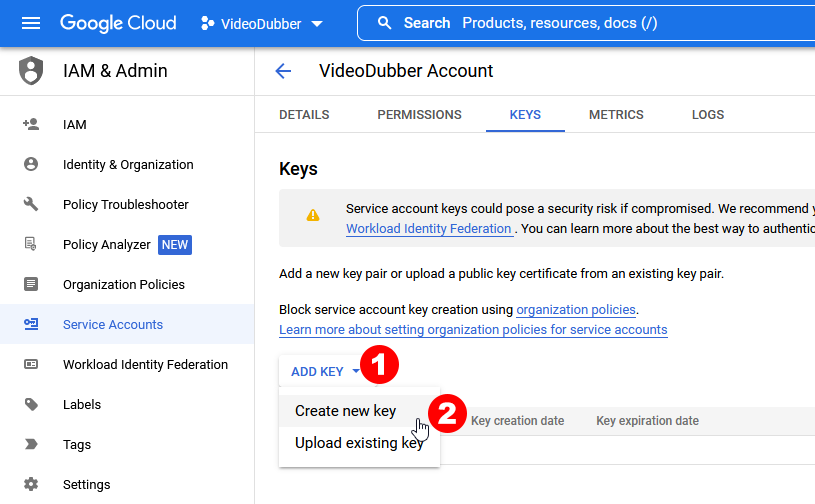
12. In the new row containing the service account details, click the 3 dots on the right side and select Manage keys.
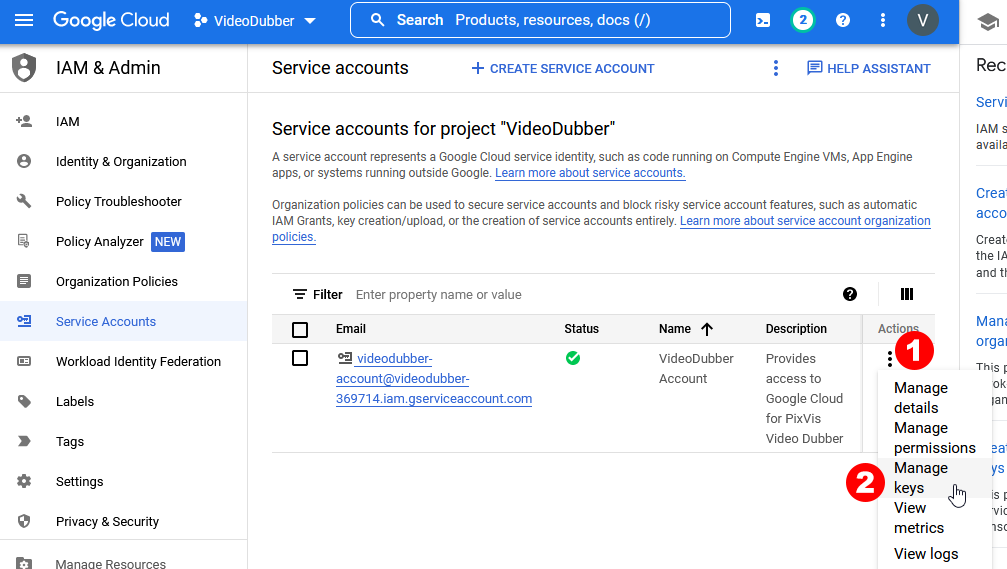
13. Select ADD KEY and then Create new key.
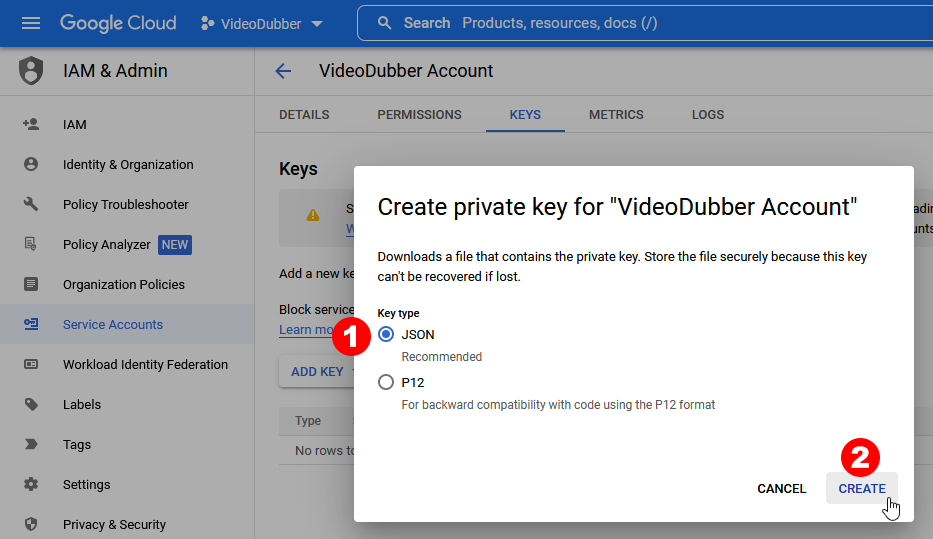
14. Select JSON and click CREATE to download a JSON file to your computer.
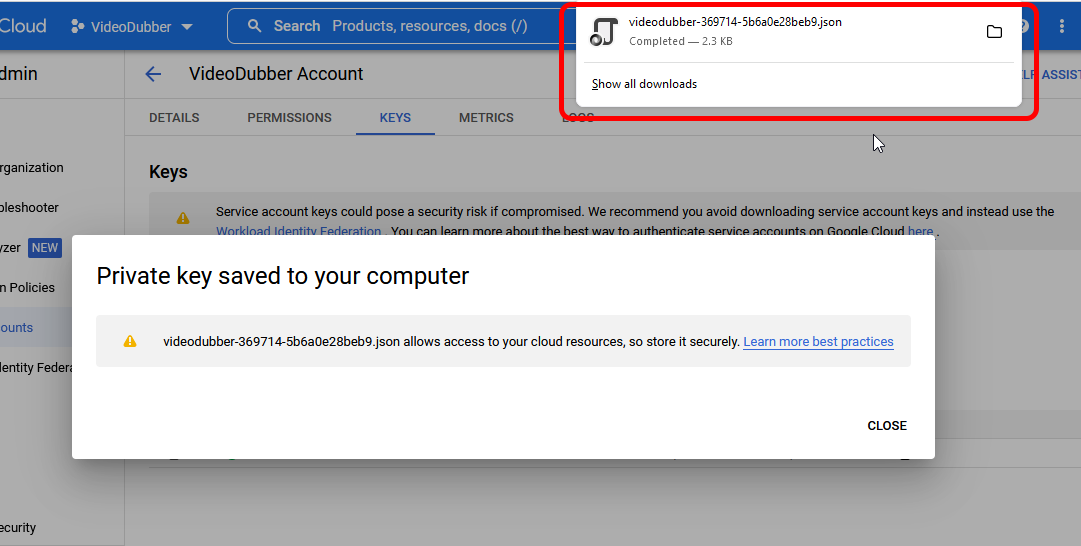
15. The credentials JSON file will be saved to your computer in Downloads folder. You need this file to configure PixVis Video Dubber application.
Step 3: Import JSON file in PixVis Video Dubber
- Start the PixVis Video Dubber application.
- Click on Settings button in toolbar.
- Click on Select credentials JSON file in settings window.
- Select downloaded JSON file and click Open.
- Click Save in settings window.